Monday, December 20, 2010

Christmas Gingerbread Cookies


For the past few years I have been making Christmas Gingerbread Cookies. That's not to say that I don't make gingerbread cookies all year round, but this way they look extra special when decorated for Christmas. The cookies make a great gift for family and friends. This year I made them for my Christmas Dress-Up Party and work colleagues, and they went down a treat. The following recipe makes about 35-37 cookies.

Ingredients for Gingerbread Cookies 
125g unsalted butter
100g brown sugar (firmly packed)
125ml golden Syrup
1 egg yolk
375g plain flour (and a little extra for dusting)
2tbs ground ginger
3tsp mixed spice
1tsp bi-carb soda


With an electric mixer, beat together the butter and sugar until creamy. Add the golden syrup and egg yolk and beat until combined. Sift flour, spices and bi-carb soda and add to the mixture. Once combined, taste the mixture as this is the best time to tell whether you need to add more spice. When you're happy, turn the mixture on to a floured surface and knead until the dough is smooth. If the mixture is a little too wet, slowly knead in some flour. Break the dough into two parts and flatten them to the shape of round discs, then cover with cling wrap and refrigerated for 30mins-1hour.

Roll out the dough on a floured surface to approximately 1cm thick (you may need to knead the dough first to make it workable). Using your desired cookie cutters, cut out the shapes and place them on a baking tray lined with baking paper. I have a set of Christmas cookie cutters which are fantastic and use the shapes that I think are easily recognisable once decorated. Bake the cookies for 10mins or until brown at 180'C. Careful not to over bake them, as they can burn quite easily. Let the cookies cool on a wire rack.


Before placing the fondant on the cookies, I use a thin spread of my Dark Chocolate Ganache on top of each cookie. This helps the fondant stick to the cookie. Alternatively you could use jam with a little boiling water to create a syrup (although make sure you strain the liquid as it needs to be smooth).


Fondant Icing 
You can buy fondant from any cake decorating store. I buy it in white and then add the desired gel colour (also found at decorating stores). Some colours are best to buy pre-mixed, as you cannot physically reach the colour depth with gel colour. I strongly recommend buying red fondant pre-mixed and coincidentally my red is called Christmas Red. Please note that when you are not using the fondant, it should be covered in plastic (cling wrap or freezer bags) as it will dry out quickly. For each different cookie's decoration you will need approximately a handful of fondant in order to cover about 6 cookies.


Angels
These are very simple as you can use white fondant and do not need to colour it. Roll out the fondant to  desired thickness (I aim for 2-3mm) on a flat surface sprinkled with corn flour - this will stop the fondant from sticking. Cut out the shape with an angel cutter and place it on top of the cookie. Use you fingers to perfectly mould the fondant on to the cookie.


Snowmen
The snowmen are exactly like the angels (follow instructions above). For the cute little hat, knead equal parts of red pre-mixed fondant with white. This is necessary as the pre-mix will be quite sticky and hard to work with on its own. Make a large amount of red as it will also be used for the candy canes and red poinsettias. Once rolled out, I use the top of the snowman cutter for the shape and then use a knife to trim the hat. For the eyes and mouth, use a skewer or something similar to poke holes in the fondant.


Christmas Trees
Your white fondant will need to be coloured for these cookies. Use your thumb to create a well in the centre of a ball of white fondant and place a few drops of dark green gel colour (I use Forest Green). Knead the fondant until the colour is blended. Once the colour is even (and the right shade), roll the fondant out to desired thickness (I aim for 2-3mm) on a flat surface sprinkled with corn flour. Cut out the tree shapes and use your hands to mould the fondant to fit the cookie.


Red Poinsettias
As done for the snowman hats, knead equal parts of red pre-mixed fondant with white. This is necessary as the pre-mix will be quite sticky and hard to work with on its own. Make a large amount as the red will also be used for the candy canes. Roll out and cut the fondant, and place the shape on the cookie.

Candy Canes
These are done exactly the same as the poinsettias. Roll out and cut the red fondant, and place the shape on the cookie. You can also make white and red candy canes, and use strips of the alternate colour to wrap around the cookie.


Now it is an absolute requirement that you try one (or two, or three) of your fabulous gingerbread before sharing them around! These gingerbread cookies are a great gift for those special to you in the festive season. All the effort and love you have put into gifts such as these make them even more special to the receiver. I use clear cellophane to wrap the cookies and tie a nice red ribbon for decoration.


Merry Christmas!
Saturday, December 4, 2010

Dark Chocolate Ganache

Ganache...I am a silky irresistibly rich icing or filling that usually comes in dark or white chocolate. I am used by chefs, cooks and bakers all over the globe. Sometimes I have a starring role in a delectable treat, but more often than not I accompany other flavours that make you go back for that naughty second helping.


Before placing fondant decorations on my cupcakes (see Vanilla Cupcakes), I always use a good helping of my Dark Chocolate Ganache. Ganache not only helps you mould the perfect foundation for fondant, but it also tastes absolutely fabulous. For 12 cupcakes I make the following batch of ganache, which will leave you enough to...you guessed it, lick the bowl!

Ingredients for Dark Chocolate Ganache
1/2 cup Pure Cream
250g (1cup) Dark Chocolate
Mostly I use dark cooking chocolate found in the baking goods aisle (the 'melt' buds come in circles the size of a 20c piece). It's reasonably priced and the result tastes great, but for something a little more special you can use dark chocolate with a high coco ratio.

Place the cream in a small saucepan and slowly bring to the boil. When little bubbles start to form, take it off the heat and add the chocolate. Stir the mixture until smooth, then pour into a bowl or container to set. Once set, the perfect consistency for icing cupcakes is like smooth peanut butter. 

Ganache is best left to set overnight and I usually leave it out on the kitchen bench covered in clingwrap. If you don't have much time, you can place it in the fridge to speed up the setting process. However the ganache will need to come back to room temperature before you use it, otherwise it will start to sweat while you're icing.


Ganache can used for so many other wonderful purposes when in the kitchen, some of which don't require it to be set. If served warm, it is fantastic dribbled over a baking treat. When not using fondant icing, I sometimes carefully pour the ganache (slightly warm) over cupcakes while they are still in their paper cases. As the ganache is still runny, it perfectly covers the cupcakes and sets beautifully. There will be many recipes to come where I will refer back to this moreish baking accompaniment.


Sunday, November 28, 2010

Gluten-free Carrot Cake with Lime Mascarpone Frosting


This one's for you Mum! 

When recently in Cairns, I came across this recipe in the local paper and had to give it a go. Not only did it sound absolutely delectable, but as my mother is a Coeliac, it gave me a chance to bake something that she could actually enjoy! As you can imagine (or maybe know from experience), not being able to eat anything with gluten makes baking, and cooking in general, a tricky feat. You must go over all ingredients with a fine tooth comb, as even a little bit of gluten to a person with Coeliac disease can be quite troublesome.

What is Coeliac Disease I hear you ask?
Coeliac disease is an auto-immune disease, which means that the body produces antibodies that attack its own tissues. For people with coeliac disease, this is triggered by gluten, a protein found in wheat, rye, barley and oats. (See the Coeliac Society of Australia for more info)

The following recipe was provided to the Cairns Post by Davy and Celia O'Rouke of Mama Coco's. I recommend this recipe and the rest of my Cairns family will whole-heartily agree. 

(Note: The original recipe places the cake batter in 2 tins, so as the icing can be placed in the middle of the cake. If you do this, the cooking time will be almost half of that listed below).

Gluten-free Carrot Cake 
6 eggs
360g caster sugar
1tps lime rind
530g finely grated carrot
320g almond meal
100g plain gluten-free flour
1 1/2 tsp ground cinnamon
1tsp ground nutmeg
1tsp ground ginger
2tsp gluten-free baking powder

Pre-heat oven to 170C. Grease and flour (or line with baking paper) a 24cm cake tin. I used a spring-form tin as it is much more baker-friendly when removing the cake. 

Separate eggs and put the whites aside to whisk later. Sift flour, spices and baking powder into a bowl and add almond meal. In a large bowl, beat together yolks, sugar and lime rind for about 4 minutes. Add grated carrot and beat until the carrot is macerated (the mixture will look quite wet). Add flour mixture and beat until combined.

Whisk egg whites until firm peaks form and then gently fold into the cake mixture. It is recommended to do this in 2 stages so the cake is as light as possible. Pour batter into cake tin and bake for 1 hour and 20 minutes or until a skewer comes out clean. It is best to keep an eye on the cake from about the 1 hour mark onwards. Let the cake cool completely on a wire rack.

Lime Mascarpone Frosting
75g caster sugar
2tbs lime juice
Pinch of salt
400g mascarpone cheese at room temperature
Roughly chopped whole walnuts (for garnish)

Combine sugar, lime juice/zest and salt and beat at low speed until the sugar is dissolved. Add the mascarpone and slowly beat until just combined (should only take a few seconds). You do not want to over beat at this stage as the mascarpone will become grainy. Spread the frosting over the cake with a spatula. I find it easier to do the sides first and then follow with the top. I then garnished the cake with roughly chopped walnuts.


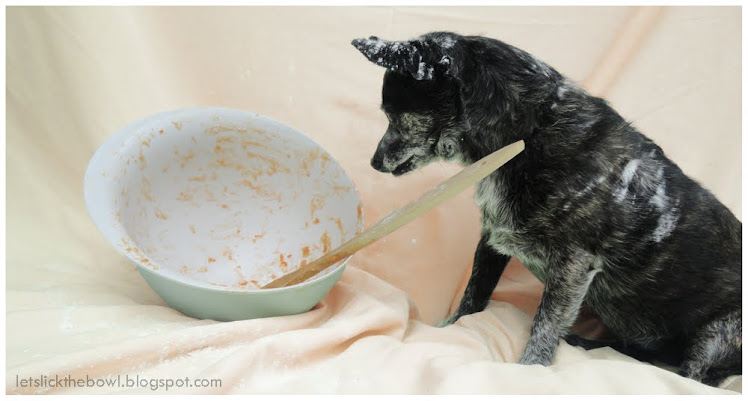
This cake was an instant hit with the family and mostly importantly, Mum. It was moist and very flavoursome. The frosting was amazing with the combination of zest and cream. This really is a fabulous substitute to the traditional cream cheese icing that is usually found on carrot cakes. I really enjoyed making this cake and our family pup Pepper also enjoyed licking the bowl in her photo shoot for my blog.

Monday, November 15, 2010

Vanilla Cupcakes


Continuing on from the theme of my first post, I'd like to share with you my favourite Vanilla Cupcake recipe. I use this recipe when I wish to bake cupcakes that I plan to decorate with fondant, however it is a great standard to have in one's repertoire. The cake texture is lovely and fluffy and melts in your mouth.  These cupcakes are always a hit with any audience. 

The key to these cupcakes is simplicity. I love that there are few ingredients and that the recipe uses less butter and sugar than some of the many others I've tried. Variations are also very easy to work in with this recipe, so you could add choc-chips, berries, or whatever your heart desires.

Ingredients for 12 Vanilla Cupcakes
150g softened unsalted butter
150g caster sugar
1tps vanilla extract
1tps finely grated lemon rind (optional)
175g self-raising flour
3 eggs
100ml milk or buttermilk

Place cupcake papers in a 12-hole cupcake tray. Good quality paper cases do make all the difference in helping your cupcake rise to the perfect height. I buy my cupcake papers from speciality cake decorating stores like Cake Decorating Central. They come in an array of colours and patterns. But be warned, once you start buying these fantastic papers you are going to want to buy the whole range!

Pre-heat your oven to 180'C.

Use an electric mixer or beaters to combine softened butter, sugar, vanilla, lemon rind and a pinch of salt until the mixture is a pale yellow and is starting to become fluffy. This should not take more than a minute or so.

Sift flour into the mixture and add eggs. Beat together while slowly adding milk. The mixture should look thick and creamy.


Using a tablespoon, place the mixture into each cupcake paper. I find that the mixture should roughly reach the 3/4 mark of the paper cases in order to ensure the cake rises to the right height (particularly for icing/decorating).

Bake for 20-25 minutes or until an inserted skewer from the middle of a cupcake comes out clean. Remove from oven and leave the cupcakes in the tray for 5 minutes before moving them onto a wire rack.


If you are planning to ice your cupcakes (of course you are...they're not the same plain!), make sure that they are completely cool before doing so. Although they are also great served warm with an oozey gooey chocolate fudge sauce and ice-cream on the side. 


Sunday, October 31, 2010

Numero Uno


While it has been a long time coming, my first blog entry is here! I have finally made the transformation from a 'gonna' to a 'do-a'. I thought it only right to start my blogging journey with the ever-lovable and popular Cupcakes. Making, decorating and very importantly eating cupcakes is the real driver behind my growing love for baking.


About a year ago I took an eye-opening cupcake decorating class with my good friend Mrs Ladybird. We learnt how to use fondant (ready-to-roll icing) from a very talented cake decorator and blogger, Sharon Wee. From this moment, creating beautiful fondant decorations on top of melt-in-your-mouth cupcakes has become a slight obsession. This obsession means I have a flourishing collection of baking and decorating tools and of course cupcake books. I don't know how I'm ever going to need almost 1000 cupcake recipes, but never say never right?


I have been making celebratory cupcakes for family, friends and work colleagues ever since Sharon's class. My most favorite decorating book for fondant inspirations is the Planet Cake book. This book has the most amazing fondant cake and cupcake creations with very detailed, easy-to-follow instructions and equipment descriptions. I would recommend this book to anyone wanting to try their hand at cake decorating. While I have yet to cross the bridge of using fondant to decorate a whole cake (it will happen, I promise), this book is a great place to start for cupcakes too. Even better, Planet Cake's new book is dedicated completely to cupcakes and I hope to make it mine in the near future.

I hope to share with you my love of baking through these blog entries. And so it begins...